 |
|
 |
eTouch
for Health... |
|
|
|
||||
| Return to Tips Menu | ||
|
|
||
|
eTip-018 Using the Interactive Neurolymphatic Points Chart |
||
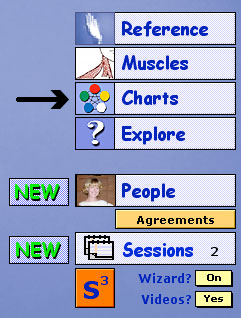
eTouch for Health includes both Static and Interactive Neurolymphatic Points Charts. In this eTip, we will use the Interactive Chart to see what muscles are related to specific Neurolymphatic Points. This is a good way to learn the Neurolymphatic Points in Touch for Health. There are two quick ways to access the Interactive Chart. You can use Explore or you and use the Charts Menu. In this tip, we will use the Charts Menu. |
||
| Using the Interactive Neurolymphatic Points Chart | ||
|
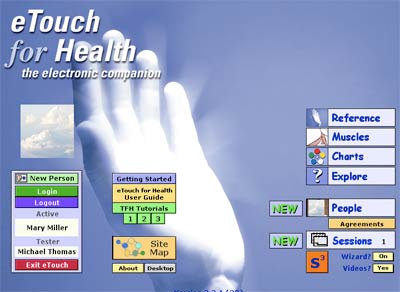
Charts Button: Third button down in far right column.
You will be taken to the Charts Menu (shown below).
|
|
Charts Menu In this tip we are going to look at the
|
The Charts Menu, shown below, provides easy access to many of the most frequently used charts in Touch for Health.
|
|
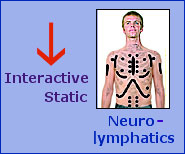
| Interactive Neurolymphatic Points Chart | ||
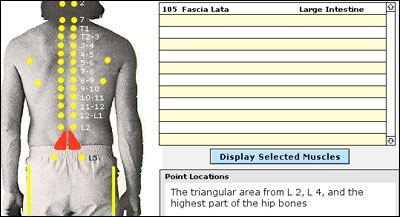
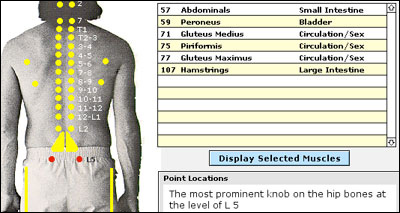
Clicking on any of the Neurolymphatic points (shown in yellow), will display the muscle(s) associated with that specific point in the list to the right of the chart. There may be only one muscle associated with a specific point or there may be multiple.
|
The clicked points will turn Red and a list of muscle(s) will be displayed associated with that specific point(s) in a list to the right of the chart. In this example, there is only one muscle, the Fascia Lata, associated with those points. The associated meridian for the points is also displayed. Notice, there is also detailed information about the point locations. Click these same points again to turn them off and clear the list.
|
|
Now we will chose another set of points.
You will be taken the the Summary page for that muscle. You also have the option to Display Selected Muscles. (See light blue button below muscle list.) This displays a detailed list of all muscles associated with those neurolymphatic points from which you can create a Session with just those muscles if desired. See below. |
 |
|
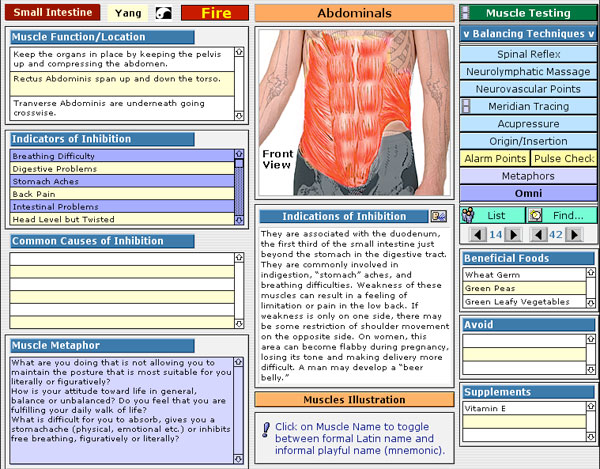
| Abdominals Summary Page | ||
|
||
If you chose the option to Display Selected Muscles, a list of all muscles associated with those Neurolymphatic Points will be displayed as shown below. By clicking on the muscle in the list, you will be taken to its Summary page. You also have the option to create a New Session using just those selected muscles. To do this, you would click the green Create New Session from Selection button shown in the top right hand corner of this list and follow regular procedure. |
||
 |
||